Sabtu, 24 Desember 2016

Om Telolet Om: WeMos D1 OLED Shield (ESP-8266EX, NodeMCU, Lua)

Pada tulisan ini akan dibuat script untuk menampilkan pesan "Selamat Hari Natal" pada WeMos D1 OLED Shield.

Gambar 1. WeMos D1 mini OLED Shield

Untuk dapat menggunakan OLED Shield, anda perlu melakukan kustomisasi firmware NodeMCU dengan memasukan module i2c dan u8g, dan memilih ukuran OLED yang digunakan.

Gambar 8. Menentukan ukuran layar OLED

Sehingga ketika boot akan tampil module yang ditandai warna merah.
NodeMCU custom build by frightanic.com
    branch: master
    commit: 81ec3665cb5fe68eb8596612485cc206b65659c9
    SSL: true
    modules: bit,cjson,crypto,dht,file,gpio,http,i2c,net,node,rtctime,sntp,tmr,u8g,uart,websocket,wifi
 build     built on: 2016-12-23 16:47
 powered by Lua 5.1.4 on SDK 1.5.4.1(39cb9a32)
Adapun script yang digunakan untuk menampikan pesan adalah sebagai berikut:

sda = 2 -- SDA Pin
scl = 1 -- SCL Pin

function init_OLED(sda,scl) --Set up the u8glib lib
     sla = 0x3C
     i2c.setup(0, sda, scl, i2c.SLOW)
     disp = u8g.ssd1306_64x48_i2c(sla)
     disp:setFont(u8g.font_6x10)
     disp:setFontRefHeightExtendedText()
     disp:setDefaultForegroundColor()
     --disp:setRot90()           -- Rotate Display if needed
     --disp:setRot180()           -- Rotate Display if needed
     --disp:setRot270()           -- Rotate Display if needed
end

function print_OLED()
   disp:firstPage()
   --disp:setScale2x2()
   repeat
     --disp:drawFrame(0,0,64,47)
     disp:drawStr(0, 10, str1)
     disp:drawStr(0, 30, str2)
   until disp:nextPage() == false
   --disp:undoScale()
end

-- Main Program
str1="  Selamat   "
str2=" Hari Natal "
init_OLED(sda,scl)
print_OLED()

Jumat, 23 Desember 2016

Om Telolet Om: WeMos D1 mini pro as APSTATION (ESP-8266EX, NodeMCU, Lua)

Pada tulisan ini akan memberi contoh script untuk mengaktifkan WeMos D1 mini pro sebagai APSTATION yang terdiri dari tiga script utama yaitu init.lua yang bertujuan untuk menghindari terjebak reboot ulang tak terhingga akibat adanya kesalahan script pada init.lua, konfigurasi untuk APSTATION adalah disimpan pada apconfig.lua, dan konfigurasi untuk sebagai STATION adalah disimpan pada credentilas.lua. Script utama anda adalah disimpan pada file app.lua, yang secara otomatis akan diaktifkan dalam waktu tiga detik. Jika ada kesalahan pada script app.lua, maka anda dapat menjalankan perintah file.remove("app.lua") dalam waktu tiga detik sehingga terhindar dari jebakan reboot ulang tak terhingga.

Gambar 1. WeMos D1 mini pro

apconfig.lua
cfg={}
cfg.ssid="myssid"
cfg.pwd="password"
cfg.auth=wifi.WPA_WPA2_PSK

dhcp_config ={}
dhcp_config.start = "192.168.4.100"

credentials.lua
-- Credentials
SSID = "rapsberrypi"
PASSWORD = "password"

init.lua
-- aplikasi ini berfungsi menghindarkan module anda terjebak
-- pada kondisi restart tak terhingga jika terjadi bugs pada
-- init.lua.

-- aplikasi ini dapat mengaktifkan board anda sebagai access
-- point, jika anda menginginkan hal ini, maka anda perlu
-- menyediakan file apconfig.lua.

-- aplikasi dapat berjalan pada dua modus, yaitu standalone
-- atau terkoneksi ke wifi.

-- agar dapat terkoneksi ke wifi, maka username dan password
-- didefinisikan pada file credentials.lua

-- aplikasi akan menunggu selama 3 detik sebelum file app.lua
-- dieksekusi, jika terjadi bugs pada app.lua, maka anda
-- dapat menjalankan file.remove("app.lua") sehingga tidak
-- terjebak pada kondisi restart tak terhingga.

function startup()
    print("Running")
    -- aplikasi autoexec anda  sekarang adalah 'app.lua'
    if file.open("app.lua") == nil then
        print("app.lua tidak ditemukan, silakan buat app.lua sebagai auto executable.")
    else 
        file.close("app.lua")
        dofile("app.lua")
    end
end

if file.open("apconfig.lua") ~= nil then
    print("activate as access point")
    dofile("apconfig.lua")
    -- set mode as stationAP  
    wifi.setmode(wifi.STATIONAP)
    wifi.setphymode(wifi.PHYMODE_G)
    wifi.ap.config(cfg)
    print("AP IP Address:" .. wifi.ap.getip())   
    pool_ipstart, pool_ipend = wifi.ap.dhcp.config(dhcp_config)
    if wifi.ap.dhcp.start() then
        print("DHCP server started, pool addr from " .. pool_ipstart .. " to " .. pool_ipend .. "!")
    else
        print("DHCP server failed!")
    end
else
    -- default mode as station
    wifi.setmode(wifi.STATION)
    wifi.setphymode(wifi.PHYMODE_N)
end

-- periksa keberadaan file credentials.lua yang mendefinisikan
-- 'SSID' and 'PASSWORD' wifi
if file.open("credentials.lua") == nil then
    -- bagian module standalone
    print("Boot sebagai module standalone")
    print("You have 3 seconds to abort")
    print("Waiting...")
    -- jalankan fungsi startup setelah 3 detik      
    tmr.alarm(0, 3000, 0, startup)
else   
    -- bagian module koneksi wifi
    file.close("credentials.lua")
    -- muat variable SSID dan PASSWORD
    dofile("credentials.lua")
    print("Koneksi ke " .. SSID)
    station_cfg={}
    station_cfg.ssid=SSID
    station_cfg.pwd=PASSWORD
    wifi.sta.config(station_cfg, false)
   
    --wifi.sta.config(SSID, PASSWORD)
    -- wifi.sta.connect() not necessary because config() uses auto-connect=true by default

    -- mencoba koneksi setiap detik sampai tmr.stop(1)
    trycount = 1
    tmr.alarm(1, 1000, 1, function()
        if wifi.sta.getip() == nil then
            print("trying " .. trycount .. " second(s)")
            trycount = trycount + 1
        else
            -- berhasil koneksi dan mendapatkan IP Address
            tmr.stop(1)
            print("WiFi connected")
            print("Client IP Address:" .. wifi.sta.getip())
            print("You have 3 seconds to abort")
            print("Waiting...")
            -- issue file.remove("app.lua") here
            -- jalankan fungsi startup setelah 3 detik      
            tmr.alarm(0, 3000, 0, startup)
        end       
    end)
end

Om Telolet Om: WeMos DH11 Shield (ESP8266EX, NodeMCU, Lua)

Pada tulisan ini akan membahas pembuatan Lua script untuk mengukur temperatur dan humidity dengan menggunakan perangkat WeMos DH11, pemakai perangkat IoT dapat membantu para peneliti untuk merekam kondisi dilapangan dari waktu ke waktu sehingga cukup berkonsentrasi pada variabel lainnya, sedangkan variabel terkait dengan temperatur dan kelembaban dapat secara otomatis direkam oleh perangkat IoT.

Gambar 1. WeMos DHT11 Shield

Interface antara DH11 shield dengan WeMos board adalah melalui pin D1, keuntungan dari pemakaian shield adalah anda tidak membutuhkan bread-board maupun menggunakan jumper untuk menghubungkan antara WeMos board dengan sensor DH11, tetapi cukup shield DH11 ditumpukan diatas WeMos board.

pinDHT11 = 4 -- pin D4 pada board WeMos D1 mini

function readFromDHT11()
    status, temp, humi, temp_dec, humi_dec = dht.read11(pinDHT11)

    if status == dht.OK then
        wib = rtctime.epoch2cal(rtctime.get()+7*60*60) -- tambah 7 WEST INDONESIA TIME
        timeStr = string.format("%04d/%02d/%02d %02d:%02d:%02d", wib["year"], wib["mon"], wib["day"], wib["hour"], wib["min"], wib["sec"])
        print(timeStr ..";" .. temp .. ";" .. humi)
      
    elseif status == dht.ERROR_CHECKSUM then
        print( "DHT Checksum error." )
    elseif status == dht.ERROR_TIMEOUT then
        print( "DHT timed out." )
    end
end

sntp.sync("1.id.pool.ntp.org",
 function(sec,usec,server)
   print('setting time to:', sec, usec, "from: " .. server)
   rtctime.set(sec, usec)
 end,

 function()
   print('failed!')
 end
)

tmr.alarm(0,1000,1,readFromDHT11) -- setiap detik baca dari sensir DHT11

Pada script berikut ini adalah melakukan log ke file harian setiap 5 detik untuk keperluaan penelitian.

pinDHT11 = 4 -- pin D4 pada board WeMos D1 mini

function readFromDHT11()
    status, temp, humi, temp_dec, humi_dec = dht.read11(pinDHT11)

    if status == dht.OK then
        wib = rtctime.epoch2cal(rtctime.get()+7*60*60) -- tambah 7 WEST INDONESIA TIME
        timeStr = string.format("%04d/%02d/%02d %02d:%02d:%02d", wib["year"], wib["mon"], wib["day"], wib["hour"], wib["min"], wib["sec"])
        --print(timeStr ..";" .. temp .. ";" .. humi)
        payload = timeStr ..";" .. temp .. ";" .. humi
        return payload
      
    elseif status == dht.ERROR_CHECKSUM then
        print( "DHT Checksum error." )
    elseif status == dht.ERROR_TIMEOUT then
        print( "DHT timed out." )
    end
end

function logToFile()
    wib = rtctime.epoch2cal(rtctime.get()+7*60*60) -- tambah 7 WEST INDONESIA TIME
    fname = string.format("%04d%02d%02d", wib["year"], wib["mon"], wib["day"])
    -- open file in 'a+' mode   
    if file.open(fname, "a+") then
        -- write 'foo bar' to the end of the file
        file.writeline(readFromDHT11())
        print("log to " .. fname)
        file.close()
    end
end

sntp.sync("1.id.pool.ntp.org",
 function(sec,usec,server)
   print('setting time to:', sec, usec, "from: " .. server)
   rtctime.set(sec, usec)
 end,

 function()
   print('failed!')
 end
)

tmr.alarm(0,5000,1,logToFile) -- setiap detik baca dari sensir DHT11
 

Kamis, 22 Desember 2016

Om Telolet Om: Switch on/off WeMos Relay Shield (ESP8266EX, NodeMCU, Lua)

What is Om Telolet Om mean? Sir honk your horn sir.

Ketika tulisan ini dibuat, fenomena Om Telolet Om lagi menjadi fenomena trend di Indonesia, dan juga menjadi trending topic di Twitter. Hal ini menjadi penasaran bagi banyak orang apa sih artinya Om Telolet Om. Berdasarkan pembacaan di Internet dapat disimpulkan bahwa "Om Telolet Om" artinya meminta kepada pengemudi Bus angkutan untuk membunyikan klakson yang memiliki suara unik dalam melodi yang dapat dimainkan oleh supir. Awalnya Om Telolet Om menjadi hiburan bagi anak-anak dimana supir memainkan lagi anak-akan seperti unyil, happy birthday, dll.

 Gambar 1. WeMos Relay Shield

Pada tulisan ini penulis membahas tentang pengendalian switch pada WeMos Relay Shield dengan Lua. Pengendalian switch adalah mengatur GPIO pin 1 kepada kondisi HIGH (switch on), dan LOW (switch off).

relayPin = 1
interval = 2000 --pause for two seconds
mode = 0

gpio.mode(relayPin, gpio.OUTPUT);

function Switch()
  if mode==0 then 
    gpio.write(relayPin, gpio.HIGH)
  else
    gpio.write(relayPin, gpio.LOW)
  end
  mode = math.abs(mode)-1
end

tmr.alarm(0,interval,1,Switch)
Pada keadaan On, maka Led pada Shield akan hidup, dan sebaliknya adalah Off.

Senin, 19 Desember 2016

IOT Tutorial: Begining WeMos D1 Mini Pro (ESP-8266EX, NodeMCU, Lua)

Setelah menunggu hampir 21 hari, akhirnya IoT board WeMos D1 mini yang saya pesan dari Aliexpress sampai juga. Berdasarkan informasi dari wemos.cc, perbedaan utama antara WeMos D1 mini dengan WeMos D1 mini pro adalah pada ukuran flash dari 4MB menjadi 16MB. Perbedaan berikutnya adalah pada USB driver yang digunakan, jika yang biasa adalah menggunakan driver CH340G, maka yang pro adalah menggunakan CP2104.

 Gambar 0. WeMos D1 mini pro

Langkah-langkah flash firmware nodemcu:
1. Install driver CP2104.
2. Koneksikan board WeMos dengan komputer anda.
3. Catat nomor port hasil koneksi.
4. Download nodemcu-Flasher (baca)
5. Kustomisasi firmware nodemcu

Untuk melakukan kustomisasi, anda dapat menggunjungi https://nodemcu-build.com/
1. Isikan alamat email anda untuk mendapatkan konfirmasi proses builds dan hasil builds yang dapat didownload
2. Pilih module-module yang ingin anda ikut sertakan pada firmware, pilihlah module yang yang butuhkan saja, karena semakin banyak module yang dimasukan, maka binary firmware akan semakin besar. Beberapa module default yang dimasukan adalah file, GPIO, net, node, timer, UART, dan wifi, anda dapat menambahkan module seperti cjson, crypto, DHT, HTTP, I2C, RTC time, SNTP, dan websocket, masukan juga SSL support TLS. (untuk lingkungan produksi, anda dapat menkustomisasi firmware anda dengan modul-modul yang anda gunakan saja dalam implementasi, sehingga ukuran firmware menjadi compact). Kemudian klik pada Start your build.
Catatan: This project uses two main branches, master and dev. dev is actively worked on and it's also where PRs should be created against. master thus can be considered "stable" even though there are no automated regression tests.

Anda akan menerima email yang memberitahukan bahwa nodemcu custom build started, silakan menunggu untuk mendapatkan hasil build (berkisar 2 menit), anda akan menerima email nodemcu custom build finished disertai dengan link untuk mendownload hasil build.

http://nodemcu-build.com/builds/nodemcu-master-15-modules-2016-12-20-01-43-07-float.bin
http://nodemcu-build.com/builds/nodemcu-master-15-modules-2016-12-20-01-43-07-integer.bin

Catatan: There are two versions for each firmware version: the integer version which supports only integer operations and the float version which contains support for floating point calculations. From a performance point of view, the integer version should be better. It’s also smaller and most of the time, you will not need to work with floating point numbers.
Dalam hal ini ukuran binary saya yang float adalah 495412 bytes

6. Lakukan flash-firmware anda dengan menggunakan nodemcu-Flasher

6a. Aktifkan software nodemcu-Flasher

Gambar 1. NodeMCU Flasher
6b. Klik pada tab config, dan pilih firmware anda (hasil download langkah sebelumnya)
Gambar 2. Select Custom Firmware
Pilihlah file custom firmware yang didownload sebelumnya.

6c. Klik pada tab advanced, dan ubah parameter flash size menjadi 16M sesuai dengan ukuran flash D1 mini pro.

Gambar 3. Ubah Flash size 16MB (sesuai ukuran flash-size D1 mini pro)
6d. Kembali kehalaman operation, dan klik pada flash untuk memulai, jika berhasil akan mendapatkan tampilan sebagai berikut ini:

Gambar 4. Hasil Flash

7.Download software Esplor untuk sebagai lingkungan pengembangan nodemcu pada alamat https://esp8266.ru/esplorer/

8. Tutup Sofware nodemcu-flasher, dan lakukan koneksi dengan software esplor

8a. Dalam hal ini saya menggunakan port 8 dan kecepatan 115200 baud dengan hasil:
PORT OPEN 115200
Communication with MCU..
8b. Tekan tombol reset pada board
NodeMCU custom build by frightanic.com
    branch: master
    commit: 81ec3665cb5fe68eb8596612485cc206b65659c9
    SSL: true
    modules: cjson,crypto,dht,file,gpio,http,i2c,net,node,rtctime,sntp,tmr,uart,websocket,wifi
 build     built on: 2016-12-20 03:33
 powered by Lua 5.1.4 on SDK 1.5.4.1(39cb9a32)
lua: cannot open init.lua
Troubleshooting:
1. Blue led keep fast flashing and board trapped in forever loop reset condition

Connect to your board on 74880 baud , shown something like this
load 0x40100000, len 25952, room 16
tail 0
chksum 0xd7
load 0x3ffe8000, len 2260, room 8
tail 12
chksum 0xd9
ho 0 tail 12 room 4
load 0x3ffe88d4, len 8, room 12
tail 8
chksum 0xc5
csum 0xc5
rf_cal[0] !=0x05,is 0xFF

 ets Jan  8 2013,rst cause:2, boot mode:(3,7)
Solution 1: Must make sure that when flashing has set flash-size to 16MB

Gambar 5. Make sure to use 16MB

Solution 2: Check your firmware size firmware, noted that size cannot over 491 KB (the space before the system data)


Sabtu, 17 Desember 2016

Tutorial NodeMCU: Posting file to Google Drive (ESP8266, WeMos, Lua)

Pada tulisan ini akan membahas posting file dari perangkat IOT berbasis ESP8266 ke google drive. Untuk menjalankan script pada pembahasan ini, anda perlu melakukan kustomisasi firmware nodemcu dengan memasukan beberapa module yang diperlukan sebagai berikut:
NodeMCU custom build by frightanic.com
    branch: master
    commit: 81ec3665cb5fe68eb8596612485cc206b65659c9
    SSL: true
    modules: cjson,crypto,dht,file,gpio,http,net,node,rtctime,sntp,tmr,uart,websocket,wifi
 build     built on: 2016-12-10 10:19
 powered by Lua 5.1.4 on SDK 1.5.4.1(39cb9a32)
Langkah-langkah:
1. Aktifkan ke Google API console
2. Klik pada Project, dan pilih Create Project

Gambar 1. Pembuatan Project Baru
3. Tambahkan Library Drive API

Gambar 2. Tambahkan Drive API
4. Aktifkan Drive API dengan klik pada Enable


Gambar 3. Google Drive API setelah di Enable

5. Tambahkan Credentials pada Project
Gambar 4. Setting Credentials

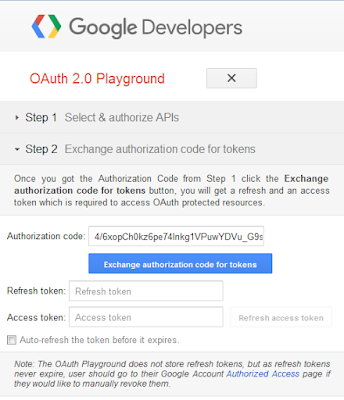
Pastikan bahwa Authorized redirect URLS adalah: https://developers.google.com/oauthplayground

6. Setting OAuth 2.0 consent screen
Gambar 5. OAuth 2.0 Consent Screen
7. Aktifkan ke Google OAauth Playground
Gambar 6. OAuth 2.0 configuration
Check Use your own OAuth credentials, isikan OAuth Client ID, dan OAuth Client secret yang dapat diperoleh pada langkah sebelumnya (pada bagian Credentials pada Google Console API).

8. Tentukan authorize API scope, dalam hal ini adalah https://www.googleapis.com/auth/drive
Gambar 7. Tentukan Scope otorisasi yang diinginkan
9. Berikan otorisasi dengan klik pada Allow
 Gambar 8. Memperbolehkan View dan Manage file pada Google Drive
10. Buat Refresh Token dan Access Token

Gambar 9. Membuat Refresh Token dan Access Token
11. Catat Authorization code, Client_Id, Client_Secret, Refresh Token
12. Lakukan koding berikut ini:

-- by Hendra Soewarno (0119067305) based on documentation
-- https://developers.google.com/identity/protocols/OAuth2WebServer
-- https://developers.google.com/drive/v2/reference/
authorization_code = "your authorization code"
client_id = "your client id"
client_secret = "your client secret"
refresh_token = "your refresh token"
access_token = nil
id = nil
title = "init.lua"

function encode_parameter(str)
    return str:gsub('[^-%._~a-zA-Z0-9]', function(c)
        return string.format("%%%02x", c:byte()):upper()
    end)
end

function changeTitle()


    local url = "https://www.googleapis.com/drive/v2/files/" .. id

    local header = "Content-type: application/json\r\n" ..
        "Authorization: Bearer " .. access_token .. "\r\n"

    local payload = "{\"title\" : \"" .. title .. "\"}"
   
    http.request(url,
        "PATCH",
        header,
        payload,
        function(code, data)
            if (code ~= 200) then
                print("Failed : HTTP error code : " .. code, data)
            else
                print("Succeed : " .. code, data)
            end
        end)
end

function uploadFile(callback)

    local url = "https://www.googleapis.com/upload/drive/v2/files?uploadType=media&convert=true"
   
    local header = "Content-type: application/text\r\n" ..
        "Authorization: Bearer " .. access_token .. "\r\n"
      
    if file.open("init.lua", "r") then
        payload = file.read(512)
        print(payload)
        file.close()
  
        http.post(url,
            header,
            payload,
            function(code, data)
                if (code ~= 200) then
                    print("Failed : HTTP error code : " .. code, data)
                else
                    print("Succeed : " .. code, data)
                    local t = cjson.decode(data)
                    id = t["id"]
                    node.task.post(changeTitle)
                end
            end)
    end
end

function getAccessToken()

    local url = "https://www.googleapis.com/oauth2/v4/token"

    local payload =
        "code=" .. encode_parameter(authorization_code) ..
        "&redirect_uri=" .. encode_parameter("https://developers.google.com/oauthplayground") ..
        "&client_id=" .. encode_parameter(client_id) ..
        "&client_secret=" .. encode_parameter(client_secret) ..
        "&scope=" ..
        "&grant_type=authorization_code"
   
    local header = "Content-type: application/x-www-form-urlencoded\r\n"
        --"Content-length: " .. string.len(payload) .. "\r\n"
       
    http.post(url,
            header,
            payload,
            function(code, data)
                if (code ~= 200) then
                    print("Failed : HTTP error code : " .. code, data)
                else
                    print("Succeed : " .. code, data)
                end
            end)       
end

function refreshAccessToken(callback)

    local url = "https://www.googleapis.com/oauth2/v4/token"

    local payload =
        "client_secret=" .. encode_parameter(client_secret) ..
        "&grant_type=refresh_token" ..
        "&client_id=" .. encode_parameter(client_id) ..
        "&refresh_token=" .. encode_parameter(refresh_token)
   
    local header = "Content-type: application/x-www-form-urlencoded\r\n"
        --"Content-length: " .. string.len(payload) .. "\r\n"
       
    http.post(url,
            header,
            payload,
            function(code, data)
                if (code ~= 200) then
                    print("Failed : HTTP error code : " .. code, data)
                else
                    print("Succeed : " .. code, data)
                    local t = cjson.decode(data)
                    access_token = t["access_token"]
                    node.task.post(uploadFile)
                end
            end)       
end

--getAccessToken()
--refreshAccessToken()
refreshAccessToken()

Hasil Run:
Succeed : 200    {
 "kind": "drive#file",
 "id": "0B9b1RNrwu14WNmsyeV9vU1RHVEE",
 "etag": "\"m64ksZC09nG4-fB1IRhNTNcF3vg/MTQ4MTk3ODM2OTYzMw\"",
 "selfLink": "https://www.googleapis.com/drive/v2/files/0B9b1RNrwu14WNmsyeV9vU1RHVEE",
 "webContentLink": "https://drive.google.com/uc?id=0B9b1RNrwu14WNmsyeV9vU1RHVEE&export=download",
 "alternateLink": "https://drive.google.com/file/d/0B9b1RNrwu14WNmsyeV9vU1RHVEE/view?usp=drivesdk",
 "embedLink": "https://drive.google.com/file/d/0B9b1RNrwu14WNmsyeV9vU1RHVEE/preview?usp=drivesdk",
 "iconLink": "https://ssl.gstatic.com/docs/doclist/images/generic_app_icon_16.png",
 "title": "Untitled",
 "mimeType": "application/text",
 "labels": {
  "starred": false,
  "hidden": false,
  "trashed": false,
  "restricted": false,
  "viewed": true
 },
 "createdDate": "2016-12-17T12:39:29.633Z",
 "modifiedDate": "2016-12-17T12:39:29.633Z",
 "modifiedByMeDate": "2016-12-17T12:39:29.633Z",
 "lastViewedByMeDate": "2016-12-17T12:39:29.633Z",
 "markedViewedByMeDate": "1970-01-01T00:00:00.000Z",
 "version": "95279",
 "parents": [
  {
   "kind": "drive#parentReference",
   "id": "0ANb1RNrwu14WUk9PVA",
   "selfLink": "https://www.googleapis.com/drive/v2/files/0B9b1RNrwu14WNmsyeV9vU1RHVEE/parents/0ANb1RNrwu14WUk9PVA",
   "parentLink": "https://www.googleapis.com/drive/v2/files/0ANb1RNrwu14WUk9PVA",
   "isRoot": true
  }
 ],
 "downloadUrl": "https://doc-0s-0g-docs.googleusercontent.com/docs/securesc/6ef3a2thq1io4lguiv000fc3n8j157mi/hkbk6sp6ejiicbcbnmof5oobimi08o6e/1481976000000/14467718844153000671/14467718844153000671/0B9b1RNrwu14WNmsyeV9vU1RHVEE?e=download&gd=true",
 "userPermission": {
  "kind": "drive#permission",
  "etag": "\"m64ksZC09nG4-fB1IRhNTNcF3vg/oL4ijP0n8GxZ7JDTDMVZhQFn1h0\"",
  "id": "me",
  "selfLink": "https://www.googleapis.com/drive/v2/files/0B9b1RNrwu14WNmsyeV9vU1RHVEE/permissions/me",
  "role": "owner",
  "type": "user"
 },
 "originalFilename": "Untitled",
 "fileExtension": "",
 "md5Checksum": "74339827856ad32167b81a9b69c6a369",
 "fileSize": "512",
 "quotaBytesUsed": "512",
 "ownerNames": [
  "Hendra Soewarno"
 ],
 "owners": [
  {
   "kind": "drive#user",
   "displayName": "Hendra Soewarno",
   "picture": {
    "url": "https://lh3.googleusercontent.com/-zT-K5R2Kl7c/AAAAAAAAAAI/AAAAAAAAAM0/rk_CEnm7hMA/s64/photo.jpg"
   },
   "isAuthenticatedUser": true,
   "permissionId": "14467718844153000671",
   "emailAddress": "hendra.soewarno@gmail.com"
  }
 ],
 "lastModifyingUserName": "Hendra Soewarno",
 "lastModifyingUser": {
  "kind": "drive#user",
  "displayName": "Hendra Soewarno",
  "picture": {
   "url": "https://lh3.googleusercontent.com/-zT-K5R2Kl7c/AAAAAAAAAAI/AAAAAAAAAM0/rk_CEnm7hMA/s64/photo.jpg"
  },
  "isAuthenticatedUser": true,
  "permissionId": "14467718844153000671",
  "emailAddress": "hendra.soewarno@gmail.com"
 },
 "editable": true,
 "copyable": true,
 "writersCanShare": true,
 "shared": false,
 "explicitlyTrashed": false,
 "appDataContents": false,
 "headRevisionId": "0B9b1RNrwu14WK01kUUtOQTdTVlljNTlhMjN5Zml5MVFsMjNRPQ",
 "spaces": [
  "drive"
 ]
}

Succeed : 200    {
 "kind": "drive#file",
 "id": "0B9b1RNrwu14WNmsyeV9vU1RHVEE",
 "etag": "\"m64ksZC09nG4-fB1IRhNTNcF3vg/MTQ4MTk3ODM3MTYwNA\"",
 "selfLink": "https://www.googleapis.com/drive/v2/files/0B9b1RNrwu14WNmsyeV9vU1RHVEE",
 "webContentLink": "https://drive.google.com/uc?id=0B9b1RNrwu14WNmsyeV9vU1RHVEE&export=download",
 "alternateLink": "https://drive.google.com/file/d/0B9b1RNrwu14WNmsyeV9vU1RHVEE/view?usp=drivesdk",
 "embedLink": "https://drive.google.com/file/d/0B9b1RNrwu14WNmsyeV9vU1RHVEE/preview?usp=drivesdk",
 "iconLink": "https://ssl.gstatic.com/docs/doclist/images/generic_app_icon_16.png",
 "title": "init.lua",
 "mimeType": "application/text",
 "labels": {
  "starred": false,
  "hidden": false,
  "trashed": false,
  "restricted": false,
  "viewed": true
 },
 "createdDate": "2016-12-17T12:39:29.633Z",
 "modifiedDate": "2016-12-17T12:39:31.604Z",
 "modifiedByMeDate": "2016-12-17T12:39:31.604Z",
 "lastViewedByMeDate": "2016-12-17T12:39:31.604Z",
 "markedViewedByMeDate": "1970-01-01T00:00:00.000Z",
 "version": "95281",
 "parents": [
  {
   "kind": "drive#parentReference",
   "id": "0ANb1RNrwu14WUk9PVA",
   "selfLink": "https://www.googleapis.com/drive/v2/files/0B9b1RNrwu14WNmsyeV9vU1RHVEE/parents/0ANb1RNrwu14WUk9PVA",
   "parentLink": "https://www.googleapis.com/drive/v2/files/0ANb1RNrwu14WUk9PVA",
   "isRoot": true
  }
 ],
 "downloadUrl": "https://doc-0s-0g-docs.googleusercontent.com/docs/securesc/6ef3a2thq1io4lguiv000fc3n8j157mi/hkbk6sp6ejiicbcbnmof5oobimi08o6e/1481976000000/14467718844153000671/14467718844153000671/0B9b1RNrwu14WNmsyeV9vU1RHVEE?e=download&gd=true",
 "userPermission": {
  "kind": "drive#permission",
  "etag": "\"m64ksZC09nG4-fB1IRhNTNcF3vg/oL4ijP0n8GxZ7JDTDMVZhQFn1h0\"",
  "id": "me",
  "selfLink": "https://www.googleapis.com/drive/v2/files/0B9b1RNrwu14WNmsyeV9vU1RHVEE/permissions/me",
  "role": "owner",
  "type": "user"
 },
 "originalFilename": "Untitled",
 "fileExtension": "lua",
 "md5Checksum": "74339827856ad32167b81a9b69c6a369",
 "fileSize": "512",
 "quotaBytesUsed": "512",
 "ownerNames": [
  "Hendra Soewarno"
 ],
 "owners": [
  {
   "kind": "drive#user",
   "displayName": "Hendra Soewarno",
   "picture": {
    "url": "https://lh3.googleusercontent.com/-zT-K5R2Kl7c/AAAAAAAAAAI/AAAAAAAAAM0/rk_CEnm7hMA/s64/photo.jpg"
   },
   "isAuthenticatedUser": true,
   "permissionId": "14467718844153000671",
   "emailAddress": "hendra.soewarno@gmail.com"
  }
 ],
 "lastModifyingUserName": "Hendra Soewarno",
 "lastModifyingUser": {
  "kind": "drive#user",
  "displayName": "Hendra Soewarno",
  "picture": {
   "url": "https://lh3.googleusercontent.com/-zT-K5R2Kl7c/AAAAAAAAAAI/AAAAAAAAAM0/rk_CEnm7hMA/s64/photo.jpg"
  },
  "isAuthenticatedUser": true,
  "permissionId": "14467718844153000671",
  "emailAddress": "hendra.soewarno@gmail.com"
 },
 "editable": true,
 "copyable": true,
 "writersCanShare": true,
 "shared": false,
 "explicitlyTrashed": false,
 "appDataContents": false,
 "headRevisionId": "0B9b1RNrwu14WK01kUUtOQTdTVlljNTlhMjN5Zml5MVFsMjNRPQ",
 "spaces": [
  "drive"
 ]
}

Trouble Shooting:
> Failed : HTTP error code : 401    {
 "error": "invalid_client",
 "error_description": "The OAuth client was not found."

Pastikan client_id telah benar

> Failed : HTTP error code : 401    {
 "error": "invalid_client",
 "error_description": "Unauthorized"
}

Pastikan client_secret telah benar

> Failed : HTTP error code : 400    {
 "error": "invalid_grant",
 "error_description": "Bad Request"
}

Pastikan refresh_token telah benar


Jumat, 16 Desember 2016

Tutorial NodeMCU: GET Twitter account/settings Using REST API (ESP8266, WeMos, Lua)

Jika pada tulisan sebelumnya kita membahas tentang bagaimana melakukan posting Tweet dengan menggunakan REST API, maka pada tulisan ini kita akan melakukan pembacaan account/setting Twitter dengan menggunakan metode GET.

Untuk menjalankan script ini, anda perlu melakukan kustomisasi firmware nodemcu dengan memasukan beberapa module berikut ini:
NodeMCU custom build by frightanic.com
    branch: master
    commit: 81ec3665cb5fe68eb8596612485cc206b65659c9
    SSL: true
    modules: cjson,crypto,dht,file,gpio,http,net,node,rtctime,sntp,tmr,uart,websocket,wifi
 build     built on: 2016-12-10 10:19
 powered by Lua 5.1.4 on SDK 1.5.4.1(39cb9a32)
Dengan script sebagai berikut:

-- by Hendra Soewarno (0119067305) base on documentation
-- https://dev.twitter.com/rest/reference/get/account/settings
api_base = "https://api.twitter.com"
consumer_key = "7LzQ03LBNtFZ8OIsgq******"
consumer_secret = "xfyoGFz2fV9nOPAS4dx9sfiHz7PZEKeGOgZJqiXb98w******"
access_token = "2203290865-ClUx6zIDTmBWI3JjML5tZlfEXOhnzvKl******"
access_token_secret = "k09y3gSIQ4pEROSvLJewd7lG51YBXcLyno23m8JM******"

-- Calculate the sha1 hash for a given string.
local function sha1(str, key)
    return crypto.hmac("sha1",str,key)
end

-- Returns the current time as a Unix timestamp.
function oauth_timestamp()
   return tostring(rtctime.get() + 1) -- we want the next second
end

-- Generate nonce none for oauth
function oauth_nonce()  
   return oauth_timestamp()
end


function encode_parameter(str)
    return str:gsub('[^-%._~a-zA-Z0-9]', function(c)
        return string.format("%%%02x", c:byte()):upper()
    end)
end

function built_base_string(baseuri, method, param)
    local t = { }
    for key, val in pairs(param) do
        table.insert(t, {key = key,val = val})
    end
   
    -- Sort by key first, then value
    table.sort(t, function(a,b)
        if a.key < b.key then
            return true
        elseif a.key > b.key then
            return false
        else
            return a.val < b.val
        end
    end)

    local key_value_pairs = { }
    for _, rec in pairs(t) do      
        table.insert(key_value_pairs, rec.key .. "=" .. encode_parameter(rec.val))
    end
   
    local query_string_except_signature = table.concat(key_value_pairs, "&")

    return method .. '&' .. encode_parameter(baseuri) .. '&' .. encode_parameter(query_string_except_signature)  
end

function built_authorization_header(oauth, oauth_signature)
    local r = "Authorization: OAuth "
    local oauth_headers = { }
   
    for key, val in pairs(oauth) do
        if (string.sub(key,1,5)=="oauth") then
            table.insert(oauth_headers, key .. "=\"" .. encode_parameter(val) .. "\"")
        end           
    end

    table.insert(oauth_headers, "oauth_signature=\"" .. oauth_signature .. "\"")

    local authorization_header = table.concat(oauth_headers, ", ")

    return r .. authorization_header
end

function requestToGet(path)
    local oauth = {
        oauth_consumer_key = consumer_key,
        oauth_nonce = oauth_nonce(),
        oauth_signature_method = "HMAC-SHA1",
        oauth_token =  access_token,
        oauth_timestamp = oauth_timestamp(),
        oauth_version = "1.0"
        }

    local signature_base_string = built_base_string(api_base .. path, "GET", oauth)
    print(signature_base_string)

    local signature_key = encode_parameter(consumer_secret) .. "&" .. encode_parameter(access_token_secret)
    print(signature_key)

    local oauth_signature = crypto.toBase64(sha1(signature_base_string, signature_key))
    print(oauth_signature)

    local header = built_authorization_header(oauth, encode_parameter(oauth_signature))
    print(header)

    local url = api_base .. path
    print(url)
   
    http.get(url,
        header,
        function(code, data)
            if (code ~= 200) then
                print("Failed : HTTP error code : " .. code, data)
            else
                print("Succeed : " .. code, data)
            end
        end)
end

sntp.sync("1.id.pool.ntp.org",
    function(sec,usec,server)
        print('setting time to:', sec, usec, "from: " .. server)
        rtctime.set(sec, usec)
        requestToGet("/1.1/account/settings.json")
    end,

    function()
        print('failed!')
    end
)

Hasil Run:

Succeed : 200   {"protected":false,"screen_name":"hendrasoewarno","always_use_https":true,"use_cookie_personalization":true,"sleep_time":{"enabled":false,"end_time":null,"start_time":null},"geo_enabled":false,"language":"en","discoverable_by_email":false,"discoverable_by_mobile_phone":false,"display_sensitive_media":false,"allow_contributor_request":"all","allow_dms_from":"following","allow_dm_groups_from":"following","smart_mute":false,"translator_type":"none"}


Rabu, 14 Desember 2016

Tutorial NodeMCU: Posting a Tweet Using REST API (IOT, ESP8266, WeMos, Lua)

Let's Machine Tweet: Tulisan ini dibuat setelah melakukan surfing tidak menemukan contoh untuk posting Tweet langsung dari NodeMCU Lua dengan menggunakan metode REST sebagaimana dokumentasi pada https://dev.twitter.com/oauth/overview/authorizing-requests (pada umumnya contoh yang diberikan adalah melalui API pihak ketiga seperti https://ifttt.com, https://thingspeak.com). Pada tulisan ini kita akan melakukan posting Tweet secara langsung dengan menggunakan REST API yang disediakan oleh Twitter. Untuk menjalankan script pada contoh dibawah ini, anda perlu melakukan kustomisasi terhadap firmware NodeMCU dengan memasukan module-module yang ditandai warna merah berikut ini:
NodeMCU custom build by frightanic.com
    branch: master
    commit: 81ec3665cb5fe68eb8596612485cc206b65659c9
    SSL: true
    modules: cjson,crypto,dht,file,gpio,http,net,node,rtctime,sntp,tmr,uart,websocket,wifi
 build     built on: 2016-12-10 10:19
 powered by Lua 5.1.4 on SDK 1.5.4.1(39cb9a32)
Pada dasarnya Twitter menyediakan dua bentuk authentication (OAUTH), yaitu user authentication (oauth1.0a protocol) dan application-only-authentication (oauth2 specification). Untuk mengirim Tweet maka dibutuhkan otorisasi melalui user authentication.

Untuk otorisasi dengan modus user authentication, maka dibutuhkan key dan token sebagai berikut ini:
  1. Consumer Key
  2. Consumer Secret
  3. Access Token
  4. Access Token Secret
Gambar 1. Key dan Token


Selanjutnya anda dapat menggunakan koding berikut ini untuk mengirim Tweet ke Twitter:
--By Hendra Soewarno (0119067305)
--base on documentation https://dev.twitter.com/oauth/overview/authorizing-requests
api_base = "https://api.twitter.com"
consumer_key = "your consumer key"
consumer_secret = "your consumer secret"
access_token = "your access token"
access_token_secret = "your access token secret"


-- Calculate the sha1 hash for a given string.
local function sha1(str, key)
    return crypto.hmac("sha1",str,key)
end

-- Returns the current time as a Unix timestamp.
function oauth_timestamp()
   return tostring(rtctime.get() + 1) -- we want the next second
end

-- Generate nonce none for oauth
function oauth_nonce()  
   return oauth_timestamp() --we use timestamp as nonce
end

function encode_parameter(str)
    return str:gsub('[^-%._~a-zA-Z0-9]', function(c)
        return string.format("%%%02x", c:byte()):upper()
    end)
end

function built_base_string(baseuri, method, param)
    local t = { }
    for key, val in pairs(param) do
        table.insert(t, {key = key,val = val})
    end
   
    -- Sort by key first, then value
    table.sort(t, function(a,b)
        if a.key < b.key then
            return true
        elseif a.key > b.key then
            return false
        else
            return a.val < b.val
        end
    end)

    local key_value_pairs = { }
    for _, rec in pairs(t) do      
        table.insert(key_value_pairs, rec.key .. "=" .. encode_parameter(rec.val))
    end
   
    local query_string_except_signature = table.concat(key_value_pairs, "&")

    return method .. '&' .. encode_parameter(baseuri) .. '&' .. encode_parameter(query_string_except_signature)  
end

function built_authorization_header(oauth, oauth_signature)
    local r = "Authorization: OAuth "
    local oauth_headers = { }
   
    for key, val in pairs(oauth) do
        if (string.sub(key,1,5)=="oauth") then
            table.insert(oauth_headers, key .. "=\"" .. encode_parameter(val) .. "\"")
        end           
    end

    table.insert(oauth_headers, "oauth_signature=\"" .. oauth_signature .. "\"")

    local authorization_header = table.concat(oauth_headers, ", ")

    return r .. authorization_header
end

function postTweet(status)
    local path = "/1.1/statuses/update.json"

    local oauth = {
        oauth_consumer_key = consumer_key,
        oauth_nonce = oauth_nonce(),
        oauth_signature_method = "HMAC-SHA1",
        oauth_token =  access_token,
        oauth_timestamp = oauth_timestamp(),
        oauth_version = "1.0",
        status=status
        }

    local payload = "status=" .. encode_parameter(status)
    print(payload)

    local signature_base_string = built_base_string(api_base .. path, "POST", oauth)
    print(signature_base_string)

    local signature_key = encode_parameter(consumer_secret) .. "&" .. encode_parameter(access_token_secret)
    print(signature_key)

    local oauth_signature = crypto.toBase64(sha1(signature_base_string, signature_key))
    print(oauth_signature)

    local header = built_authorization_header(oauth, encode_parameter(oauth_signature))
    print(header)

    local url = api_base .. path
    print(url)

    http.post(url,
        "Content-Type: application/x-www-form-urlencoded\r\n" ..
        header,
        payload,
        function(code, data)
            if (code ~= 200) then
                print("Failed : HTTP error code : " .. code, data)
            else
                print("Succeed : " .. code, data)
            end
        end)
end

sntp.sync("1.id.pool.ntp.org",
    function(sec,usec,server)
        print('setting time to:', sec, usec, "from: " .. server)
        rtctime.set(sec, usec)
        postTweet("Hello WeMos1!")
    end,

    function()
        print('failed!')
    end
)
Hasil Run:
Succeed : 200    {"created_at":"Wed Dec 14 16:39:00 +0000 2016","id":809075225799180288,"id_str":"809075225799180288","text":"Hello WeMos1!","truncated":false,"entities":{"hashtags":[],"symbols":[],"user_mentions":[],"urls":[]},"source":"\u003ca href=\"http:\/\/hsoewarno.blogspot.com\" rel=\"nofollow\"\u003eNodeMCU8266\u003c\/a\u003e","in_reply_to_status_id":null,"in_reply_to_status_id_str":null,"in_reply_to_user_id":null,"in_reply_to_user_id_str":null,"in_reply_to_screen_name":null,"user":{"id":2203290865,"id_str":"2203290865","name":"hendra soewarno","screen_name":"hendrasoewarno","location":"","description":"","url":null,"entities":{"description":{"urls":[]}},"protected":false,"followers_count":1,"friends_count":0,"listed_count":0,"created_at":"Tue Nov 19 15:27:54 +0000 2013","favourites_count":0,"utc_offset":null,"time_zone":null,"geo_enabled":false,"verified":false,"statuses_count":4,"lang":"en","contributors_enabled":false,"is_translator":false,"is_translation_enabled":false,"profile_background_color":"C0DEED","profile_background_image_url":"http:\/\/abs.twimg.com\/images\/themes\/theme1\/bg.png","profile_background_image_url_https":"https:\/\/abs.twimg.com\/images\/themes\/theme1\/bg.png","profile_background_tile":false,"profile_image_url":"http:\/\/abs.twimg.com\/sticky\/default_profile_images\/default_profile_6_normal.png","profile_image_url_https":"https:\/\/abs.twimg.com\/sticky\/default_profile_images\/default_profile_6_normal.png","profile_link_color":"1DA1F2","profile_sidebar_border_color":"C0DEED","profile_sidebar_fill_color":"DDEEF6","profile_text_color":"333333","profile_use_background_image":true,"has_extended_profile":false,"default_profile":true,"default_profile_image":true,"following":false,"follow_request_sent":false,"notifications":false,"translator_type":"none"},"geo":null,"coordinates":null,"place":null,"contributors":null,"is_quote_status":false,"retweet_count":0,"favorite_count":0,"favorited":false,"retweeted":false,"lang":"en"}

Gambar 2. Hasil Tweet

Hasil Run kedua kali:
Failed : HTTP error code : 403    {"errors":[{"code":187,"message":"Status is a duplicate."}]}

Troubleshooting:
Failed : HTTP error code : 401    {"errors":[{"code":32,"message":"Could not authenticate you."}]}

Silakan periksa kembali consumer key, consumer secret, access token dan access token secret anda, atau pada header tidak terdapat "Content-Type: application/x-www-form-urlencoded\r\n" (penulis juga terjebak dengan debugging berhari-hari karena tidak memasukan Content-Type). Penyebab lain juga bisa disebabkan oleh setting permisi dari aplikasi Twitter anda, denagn memastikan sudah diset ke Read and Write.


Gambar 3. Permission pada aplikasi Twitter.

Minggu, 11 Desember 2016

Tutorial NodeMCU: Twitter Application-only authentication via REST API (ESP8266, WeMos, NodeMCU, Lua)

Tulisan ini membahas tentang application-only-authentication yang disediakan oleh Twitter untuk melakukan aksi seperti:
  • Pull user timelines;
  • Access friends and followers of any account;
  • Access lists resources;
  • Search in tweets;
  • Retrieve any user information;
Dengan application-only-authentication anda tidak dapat melakukan aksi seperti:
  • Post tweets or other resources;
  • Connect in Streaming endpoints;
  • Search for users;
  • Use any geo endpoint;
  • Access DMs or account credentials;
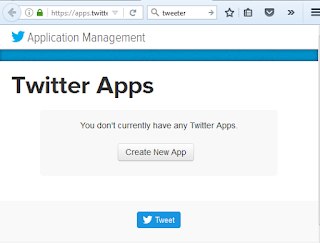
Untuk mencoba koding dibawah ini, anda perlu membuat aplikasi pada Twitter dengan mengunjungi https://apps.twitter.com/, dan kemudian klik pada Create New App

Gambar 1. Pembuatan aplikasi Twitter

Selanjutnya anda perlu melengkapi data yang dibutuhkan.

Gambar 2. Pengisian parameter aplikasi

Setelah aplikasi terbentuk, maka anda perlu membuat token consumer_key dan consumer_secret yang dapat diakses melalui Application Setting dengan klik pada manage key and access tokens.

Gambar 3. Application Settings

Selanjutnya catat consumer_key dan consumer_secret yang nantinya akan digunakan untuk mendapatkan access_token.

Gambar 4. Application Settings (token)

Selanjutnya anda dapat mengakses aplikasi Twitter dengan metode REST secara application-only-authentication sebagaimana dokumentasi pada https://dev.twitter.com/oauth/application-only
Adapun koding pada nodemcu LUA adalah sebagai berikut:

-- by Hendra Soewarno (0119067305) base on https://dev.twitter.com/oauth/application-only
-- documentation
api_base = "https://api.twitter.com"
consumer_key = "wFfeywcbxse5bM7EvTZ******"
consumer_secret = "udECdtpnnUoodCz*******RwLmmHRagMtjpsHuymppGD7VQDA"
access_token = nil

function requestAPIResource()
    if (access_token ~= nil) then
        local path = "/1.1/statuses/user_timeline.json?count=1&screen_name=lgladdy"
        local header =
            "Authorization: Bearer " .. access_token .. "\r\n" ..
            "Accept-Encoding: text/plain\r\n"

        print(header)   
          
        http.get(api_base .. path,
            header,
            function(code, data)
                if (code ~= 200) then
                    print("Failed : HTTP error code : " .. code)
                else
                    print("Succeed : " .. code, data)             
                end
            end)
     end
end

function requestBearerToken(callback)
    local path = "/oauth2/token"
    local bearer_token = consumer_key .. ":" .. consumer_secret
    local bearer_token64 = crypto.toBase64(bearer_token)

    local payload = "grant_type=client_credentials"

    local header =
        "Authorization: Basic " .. bearer_token64 .. "\r\n" ..
        "Content-Type: application/x-www-form-urlencoded;charset=UTF-8\r\n" ..
        "Accept-Encoding: text/plain\r\n"

    print(header)

    http.post(api_base .. path,
        header,
        payload,
        function(code, data)
            if (code ~= 200) then
                print("Failed : HTTP error code : " .. code)
            else
                print("Succeed : " .. code, data)
                local t = cjson.decode(data)
                if (t["token_type"] == "bearer") then
                    access_token = t["access_token"]
                    node.task.post(callback) -- Executing HTTP request followed by another HTTP request
                else
                    print(t["token_type"])
                end
            end
        end)
end

requestBearerToken(requestAPIResource)
Beberapa hal yang perlu menjadi perhatian untuk menjalankan koding diatas, adalah ada membutuhkan kustomisasi pada firmware NodeMCU dengan memasukan beberapa module berikut ini:

NodeMCU custom build by frightanic.com
    branch: master
    commit: 81ec3665cb5fe68eb8596612485cc206b65659c9
    SSL: true
    modules: cjson,crypto,dht,file,gpio,http,net,node,rtctime,sntp,tmr,uart,websocket,wifi
 build     built on: 2016-12-10 10:19
 powered by Lua 5.1.4 on SDK 1.5.4.1(39cb9a32)
Untuk menjalankan perintah HTTP request yang diikuti dengan perintah HTTP request selanjutnya, maka anda perlu menggunakan perintah node.task.post(callback), dimana callback adalah fungsi HTTP request lanjutan yang diperlukan.

Hasil eksekusi:

> dofile("app.lua");
Authorization: Basic d0ZmZXl3Y2J4c2U1Yk03RXZUWkhsa3FIZDp1ZEVDZHRwbm5Vb29kQ3p5dmMzTEFId1J3TG1tSFJhZ010anBzSHV5bXBwR0Q3VlFEQQ==
Content-Type: application/x-www-form-urlencoded;charset=UTF-8
Accept-Encoding: text/plain

> Succeed : 200    {"token_type":"bearer","access_token":"AAAAAAAAAAAAAAAAAAAAALZ***AAAAAAwk8%2FhVZPVptCvXdJJ11JMVAZNzs%3DSMOagw0LfgVtJzTSdF8a8iQjlPb5tkOW4MHGJ9EgCEiXfSwCOp"}
Authorization: Bearer AAAAAAAAAAAAAAAAAAAAALZ***AAAAAAwk8%2FhVZPVptCvXdJJ11JMVAZNzs%3DSMOagw0LfgVtJzTSdF8a8iQjlPb5tkOW4MHGJ9EgCEiXfSwCOp
Accept-Encoding: text/plain

Succeed : 200    [{"created_at":"Sun Dec 11 09:27:20 +0000 2016","id":807879432073580545,"id_str":"807879432073580545","text":"That\u2019s certainly an\u2026 impressive jacket, Diana Abbott. #Marr","truncated":false,"entities":{"hashtags":[{"text":"Marr","indices":[54,59]}],"symbols":[],"user_mentions":[],"urls":[]},"source":"\u003ca href=\"http:\/\/tapbots.com\/tweetbot\" rel=\"nofollow\"\u003eTweetbot for i\u039fS\u003c\/a\u003e","in_reply_to_status_id":null,"in_reply_to_status_id_str":null,"in_reply_to_user_id":null,"in_reply_to_user_id_str":null,"in_reply_to_screen_name":null,"user":{"id":5394402,"id_str":"5394402","name":"Liam Gladdy","screen_name":"lgladdy","location":"Bath, England","description":"I make parts of the internet. I play the video games too, and watch too much TV. I'm basically just a geek.","url":"https:\/\/t.co\/gRIFHbUGmf","entities":{"url":{"urls":[{"url":"https:\/\/t.co\/gRIFHbUGmf","expanded_url":"http:\/\/www.gladdy.co.uk","display_url":"gladdy.co.uk","indices":[0,23]}]},"description":{"urls":[]}},"protected":false,"followers_count":1569,"friends_count":322,"listed_count":85,"created_at":"Sun Apr 22 07:47:17 +0000 2007","favourites_count":50,"utc_offset":0,"time_zone":"London","geo_enabled":true,"verified":false,"statuses_count":91616,"lang":"en-gb","contributors_enabled":false,"is_translator":false,"is_translation_enabled":false,"profile_background_color":"000000","profile_background_image_url":"http:\/\/pbs.twimg.com\/profile_background_images\/662558757\/7rxa1rvaq99ve6wjm6ig.jpeg","profile_background_image_url_https":"https:\/\/pbs.twimg.com\/profile_background_images\/662558757\/7rxa1rvaq99ve6wjm6ig.jpeg","profile_background_tile":false,"profile_image_url":"http:\/\/pbs.twimg.com\/profile_images\/625205033672536064\/hVNRDCjs_normal.jpg","profile_image_url_https":"https:\/\/pbs.twimg.com\/profile_images\/625205033672536064\/hVNRDCjs_normal.jpg","profile_banner_url":"https:\/\/pbs.twimg.com\/profile_banners\/5394402\/1398195550","profile_link_color":"042242","profile_sidebar_border_color":"000000","profile_sidebar_fill_color":"E0EBFF","profile_text_color":"042242","profile_use_background_image":true,"has_extended_profile":false,"default_profile":false,"default_profile_image":false,"following":null,"follow_request_sent":null,"notifications":null,"translator_type":"none"},"geo":null,"coordinates":null,"place":{"id":"1db4f0a70fc5c9db","url":"https:\/\/api.twitter.com\/1.1\/geo\/id\/1db4f0a70fc5c9db.json","place_type":"city","name":"Bath","full_name":"Bath, England","country_code":"GB","country":"United Kingdom","contained_within":[],"bounding_box":{"type":"Polygon","coordinates":[[[-2.4113744,51.350545],[-2.322492,51.350545],[-2.322492,51.408754],[-2.4113744,51.408754]]]},"attributes":{}},"contributors":null,"is_quote_status":false,"retweet_count":0,"favorite_count":0,"favorited":false,"retweeted":false,"lang":"en"}]

Minggu, 04 Desember 2016

Tutorial NodeMCU: Mengirim email beserta attachment melalui SMTP provider anda (ESP8266, WeMos, NodeMCU, Lua)

Tulisan ini membahas tentang pengiriman email melalui SMTP yang disediakan oleh provider anda. Dalam hal ini saya menggunakan internet Bolt, sehingga SMTP saya adalah:

local SMTP_SERVER = "smtp.internux.co.id"
local SMTP_PORT = "25"

Karena koneksi SMTP adalah tidak terenkripsi, sehingga ketika melakukan koneksi adalah menggunakan unsecure net socket connection.

smtp_socket = net.createConnection(net.TCP,0) -- 0 adalah unsecured
 Secara lengkap koding yang digunakan adalah:
-- Oleh Hendra Soewarno (0119067305)
  local MY_EMAIL = "hendra-it@internux.co.id"
 -- The SMTP server and port of your email provider.
 -- If you don't know it google [my email provider] SMTP settings
 local SMTP_SERVER = "smtp.internux.co.id"
 local SMTP_PORT = "25"
 -- The account you want to send email to
 local mail_to = "***********@gmail.com"
 -- These are global variables. Don't change their values
 -- they will be changed in the functions below
 local email_subject = ""
 local email_body = ""
 local count = 0 -- will be used to determine next action
 local good_news = {"220", "250", "250", "250", "354", "250", "221"}

 local smtp_socket = nil -- will be used as socket to email server

  -- The display() function will be used to print the SMTP server's response
 function display(sck,response)
    print("Got a response: ")
    print(response)
    response_code = string.sub(response,1,3)
    --print(response_code)
    --print(good_news[count+1])
    if(response_code~=good_news[count+1])then
        print("Send email failed!")
        count = 5 --Quit
    end 
    do_next()
 end
 -- The do_next() function is used to send the SMTP commands to the SMTP server in the required sequence.
 -- I was going to use socket callbacks but the code would not run callbacks after the first 3.
 function do_next()
       if(count == 0)then
         local IP_ADDRESS = wifi.sta.getip()
         print ("Send my IP: " .. IP_ADDRESS)
         smtp_socket:send("HELO "..IP_ADDRESS.."\r\n")
       elseif(count==1) then
         smtp_socket:send("MAIL FROM:" .. MY_EMAIL .. "\r\n")
       elseif(count==2) then
         smtp_socket:send("RCPT TO:" .. mail_to .."\r\n")
       elseif(count==3) then
         smtp_socket:send("DATA\r\n")
       elseif(count==4) then
         fin=file.open("temp","r")

         -- read chunk by chunk from temp file to prevent 1460 hard limit
         local function send(localSocket)
            local msg_chunk=file.read(1024)
            if msg_chunk ~= nil then
               localSocket:send(string.gsub(msg_chunk,"\r\n.\r\n",""))
               print(msg_chunk)
            else
               smtp_socket:on("sent", function() end)
               localSocket:send("\r\n.\r\n") --end of message
            end
         end

         -- triggers the send() function again once the first chunk of data was sent
         smtp_socket:on("sent", send) -- trigger next chunck
         send(smtp_socket) -- send first chunck
      
       elseif(count==5) then
          tmr.stop(0)
          smtp_socket:send("QUIT\r\n")
       else
         smtp_socket:close()
         print("Disconnected.")
       end
       count = count + 1
 end
 -- The connectted() function is executed when the SMTP socket is connected to the SMTP server.
 -- This function will create a timer to call the do_next function which will send the SMTP commands
 -- in sequence, one by one, every 5000 seconds.
 -- You can change the time to be smaller if that works for you, I used 5000ms just because.
 function connected(sck)
   print("Connected - Starting...")
 end
 -- @name send_email
 -- @description Will initiated a socket connection to the SMTP server and trigger the connected() function
 -- @param subject The email's subject
 -- @param body The email's body
 function send_email(subject, body_plain, body_html, attachment)
    count = 0
    content = {}
    fin=file.open(attachment,"r")
    if fin then
       repeat
          local line=file.read(1024)
          if line then table.insert(content, line) end
       until not line     
       fin.close()     
    else
        print("File :" .. attachment .. " not found!")
        return 0
    end
  
    email_subject = subject
    -- put message at a temp file
    fout = file.open("temp","w")
    if fout then     
       fout:write("From: \"".. MY_EMAIL .."\"\r\n")
       fout:write("To: \"".. mail_to .. "\"\r\n")     
       fout:write("Subject: ".. email_subject .. "\r\n")
       fout:write("MIME-Version: 1.0\r\n")  
       fout:write("Content-Type: multipart/mixed; boundary=\"----=_MixPart_920403024\"\r\n\r\n")
       fout:write("------=_MixPart_920403024\r\n")
       fout:write("Content-Type: multipart/alternative; boundary=\"----=_AltPart_920403024\"\r\n\r\n")
       fout:write("------=_AltPart_920403024\r\n")
       fout:write("Content-type: text/plain; charset=iso-8859-1\r\n")
       fout:write("Content-Transfer-Encoding: quoted-printable\r\n\r\n")
       fout:write(body_plain .. "\r\n")
       fout:write("------=_AltPart_920403024\r\n")
       fout:write("Content-type: text/html; charset=iso-8859-1\r\n")
       fout:write("Content-Transfer-Encoding: quoted-printable\r\n\r\n")
       fout:write(body_html .. "\r\n")
       fout:write("------=_AltPart_920403024--\r\n")
       fout:write("------=_MixPart_920403024\r\n")
       fout:write("Content-Type: text/plain; name=" .. attachment .. "\r\n")
       fout:write("Content-Transfer-Encoding: 8bit\r\n")
       fout:write("Content-Disposition: attachment; filename=" .. attachment .. "\r\n\r\n")
       local i = 1
       while table.getn(content) > 0 do
           fout:write(table.remove(content,1))
       end
       fout:write("\r\n")
       fout:write("------=_MixPart_920403024--\r\n")
       fout:close()
    end
    print ("Open Connection")
    smtp_socket = net.createConnection(net.TCP,0)
    smtp_socket:on("connection",connected)
    smtp_socket:on("receive",display)
    smtp_socket:connect(SMTP_PORT,SMTP_SERVER)
 end
 -- Send an email
 print ("Sending started...")
 send_email("ESP8266-GMailSender with attachment","Please refer to attachment","<p>Please refer to attachment!</p>","init.lua")